Basic Usage
Learn how to use the N-Slice Editor to configure your slices
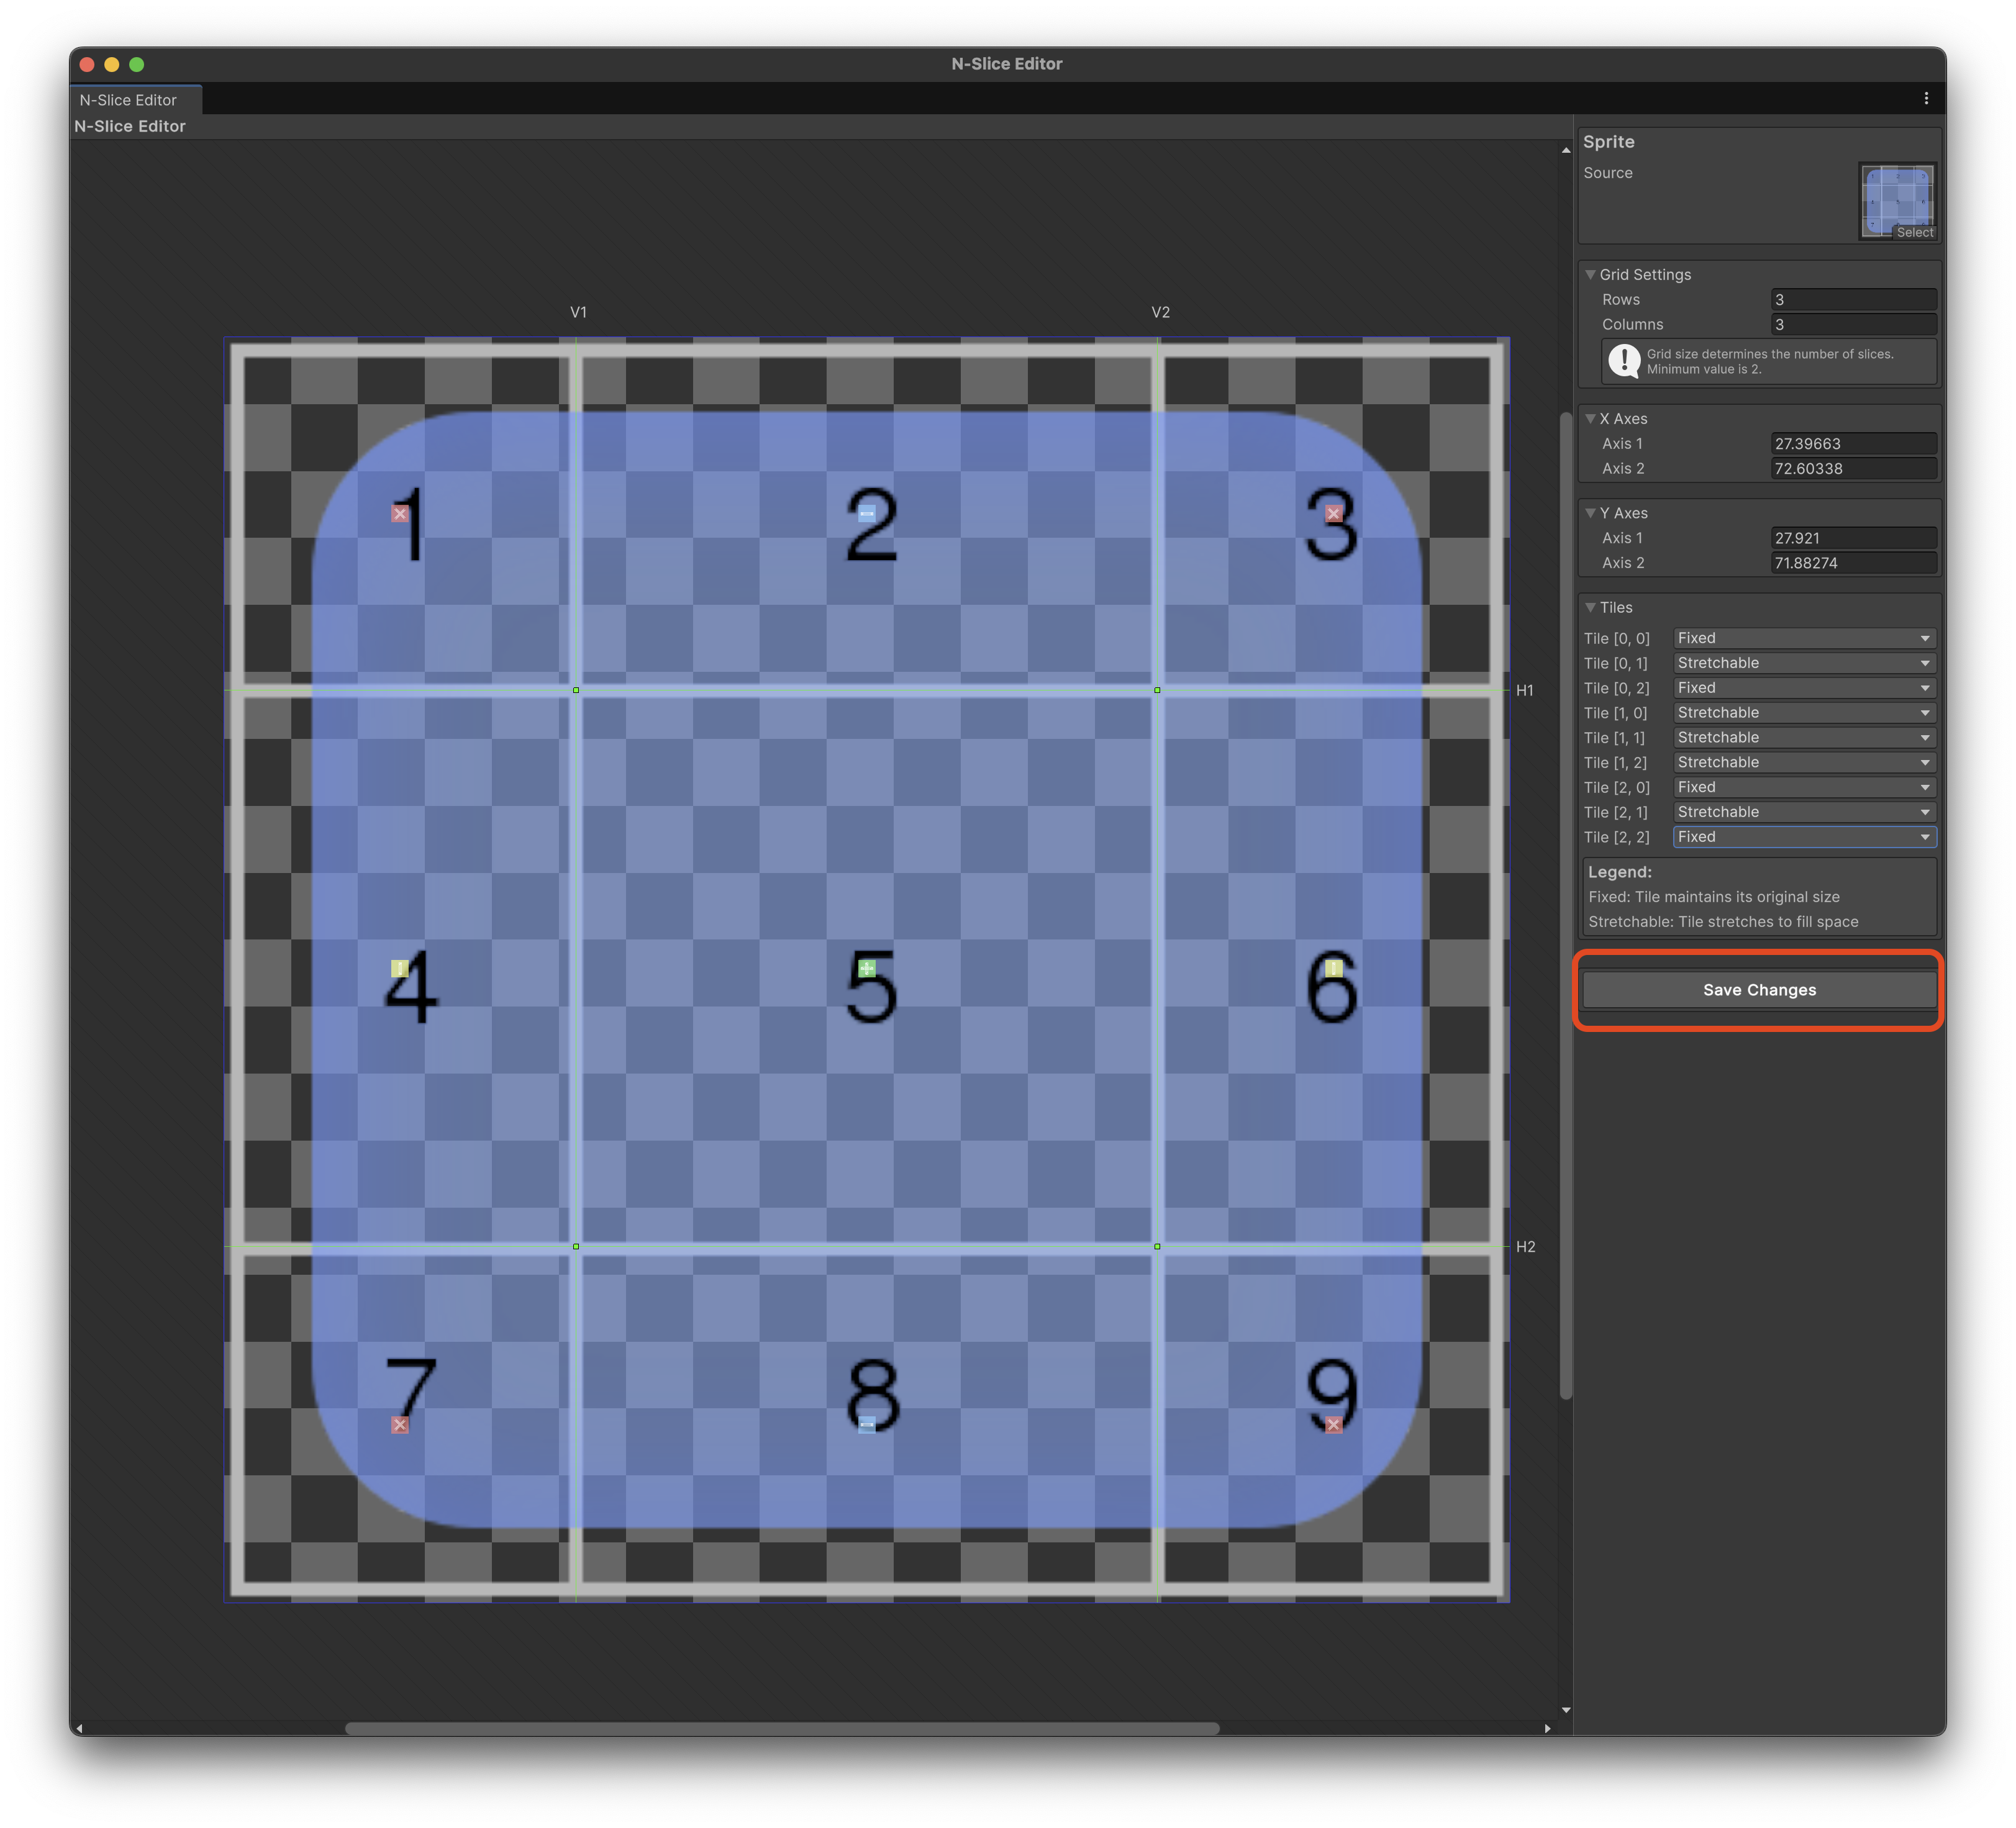
N-Slice Editor Screen
After clicking the Create New button and selecting a sprite, the N-Slice Editor screen will be displayed as follows:
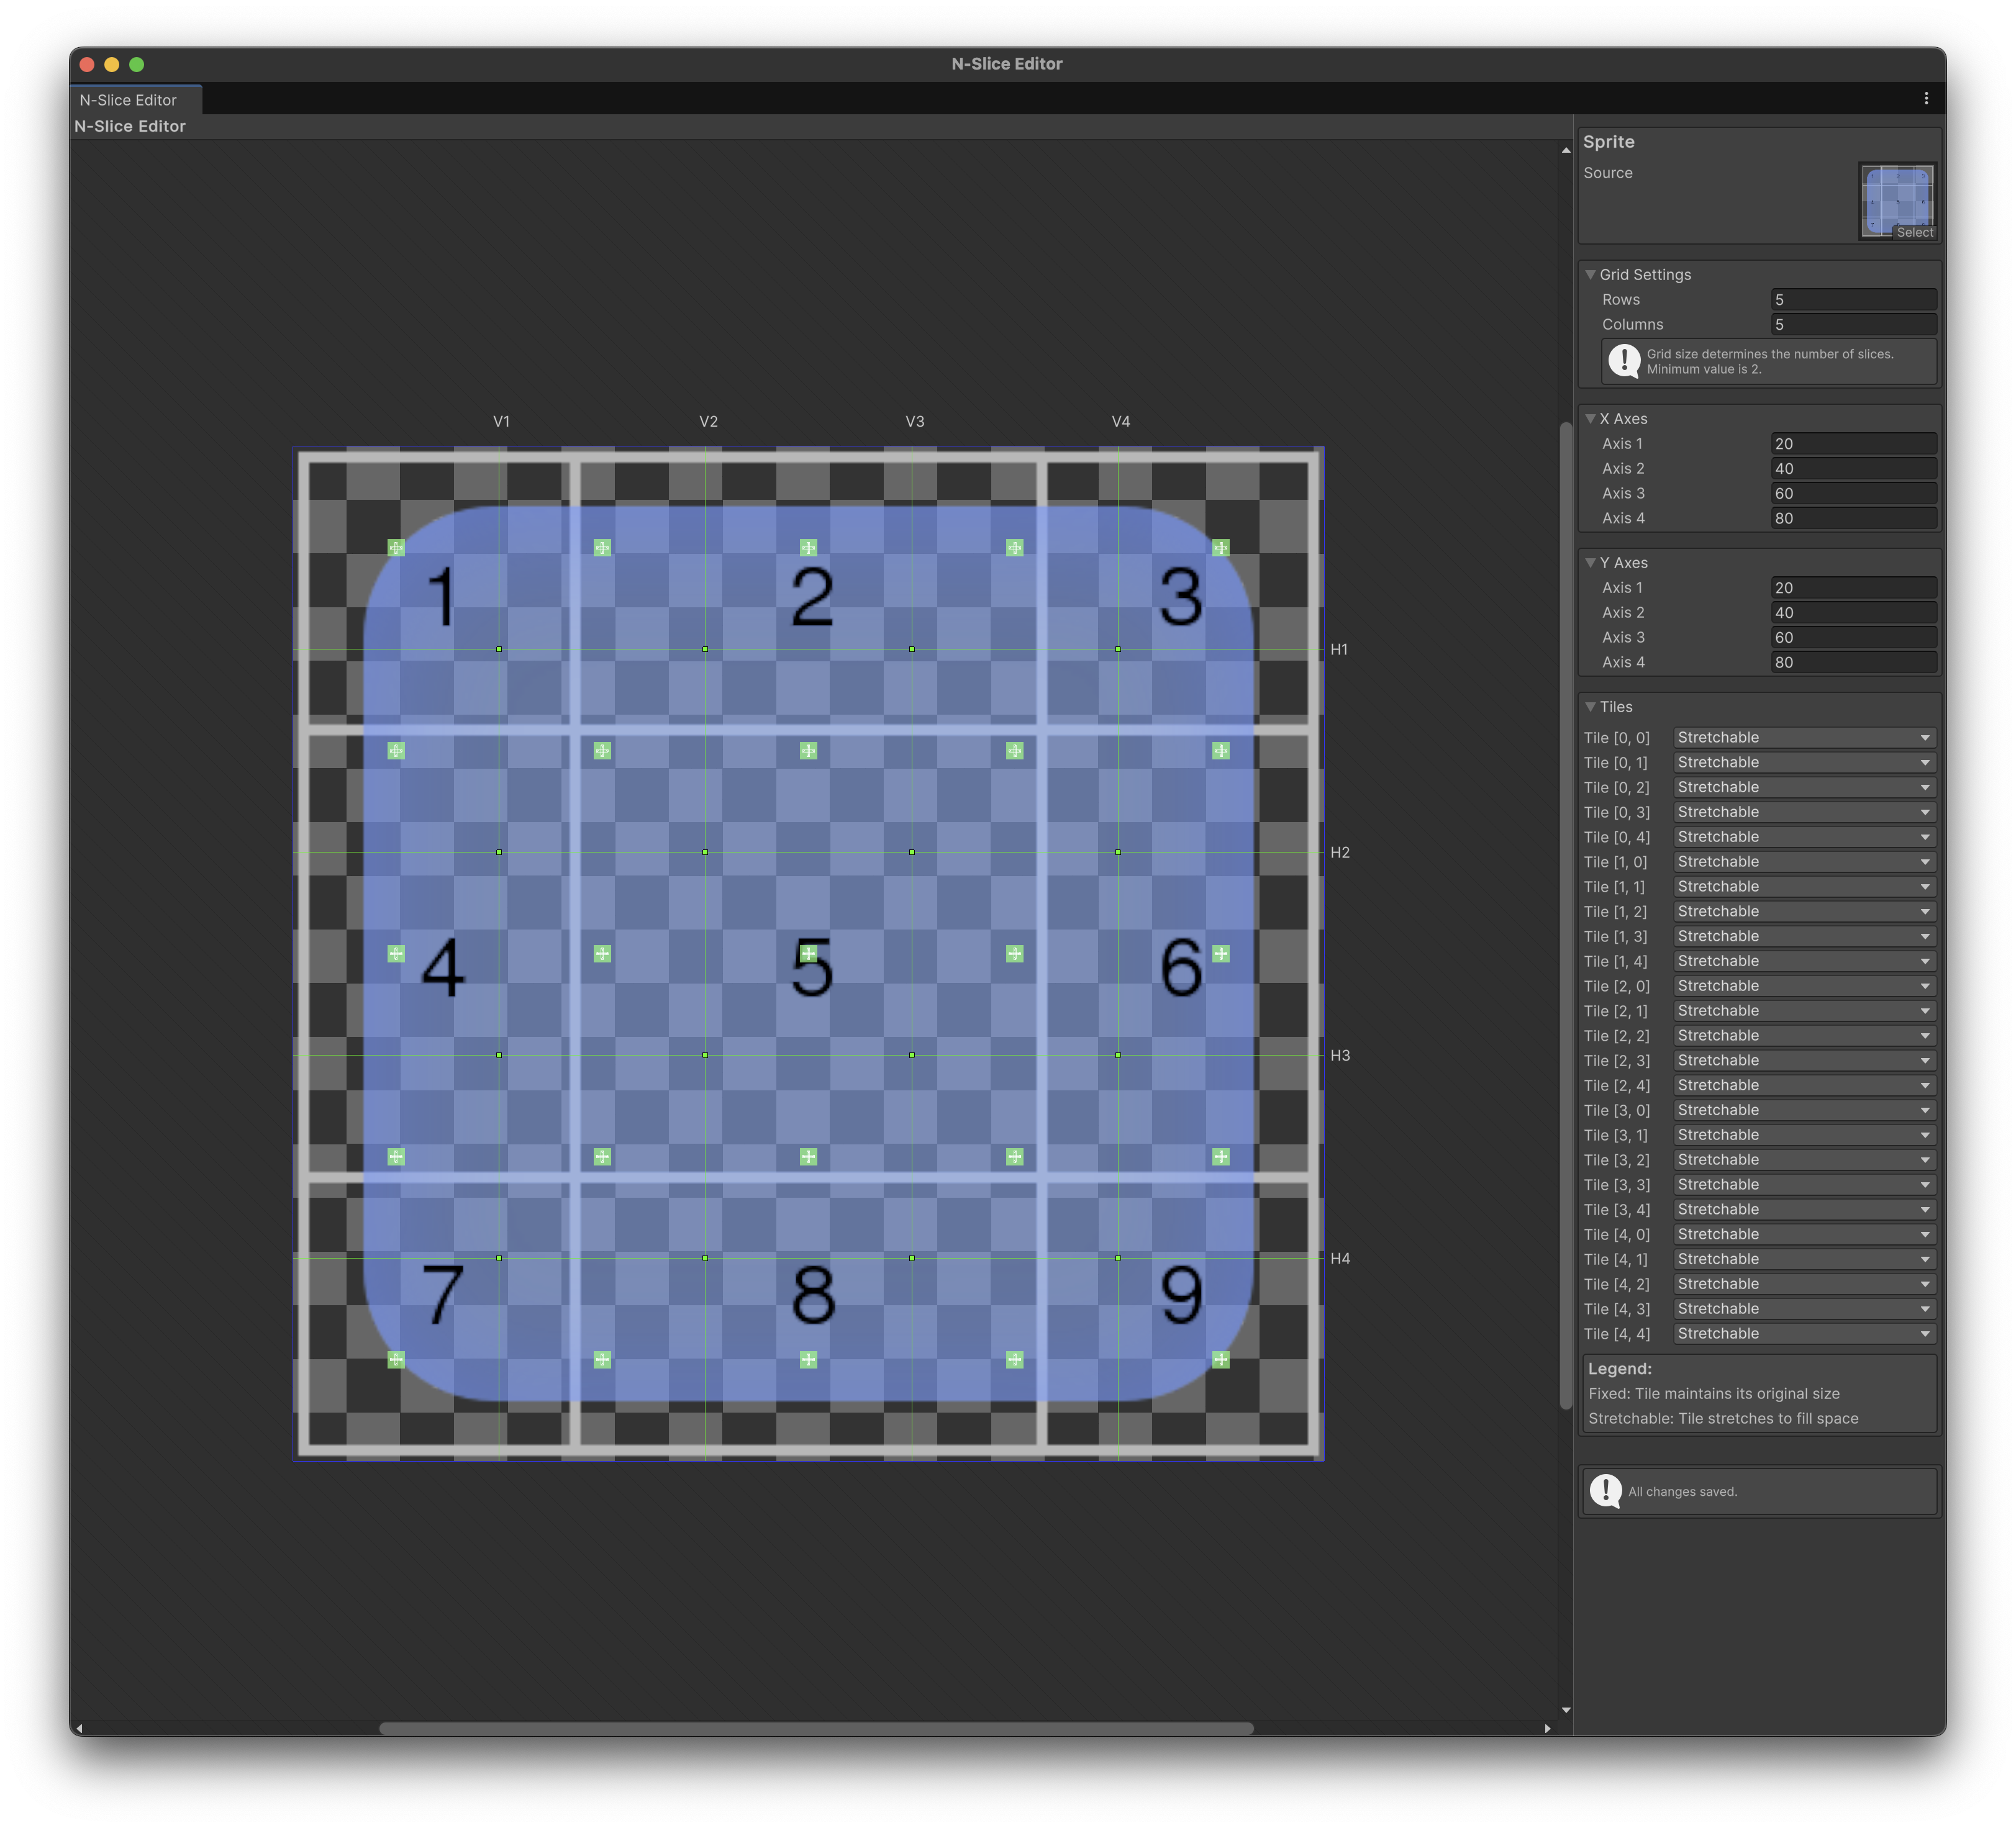
The default setting is a 5x5 grid with all tiles set to Stretchable.
Tip
(If the sprite is not visible in the editor screen, move the horizontal or vertical slider of the editor to check if it's hidden outside the screen.)
Creating a Simple 9-Slice
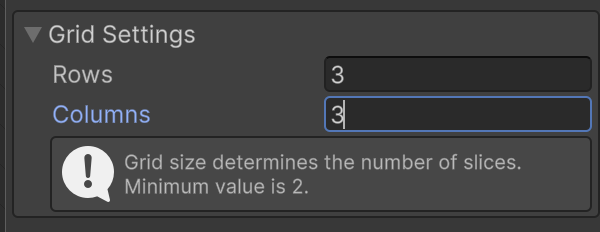
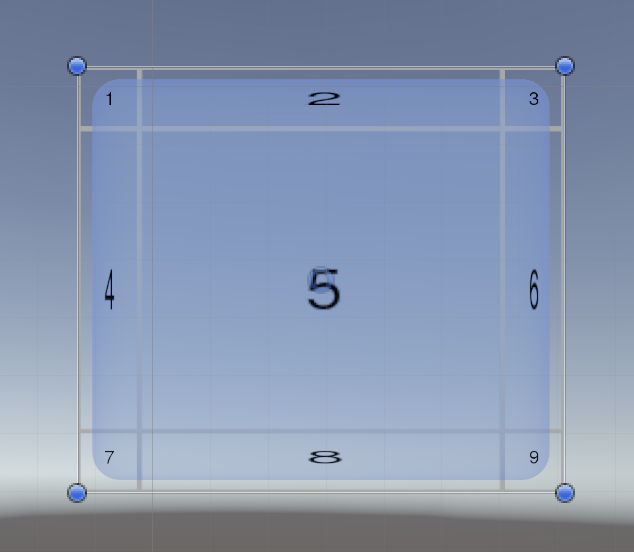
First, let's create the simplest 3x3 9-slice using N-Slicer.
-
Set both Rows and Columns to 3 in the Grid Settings at the top right.
-
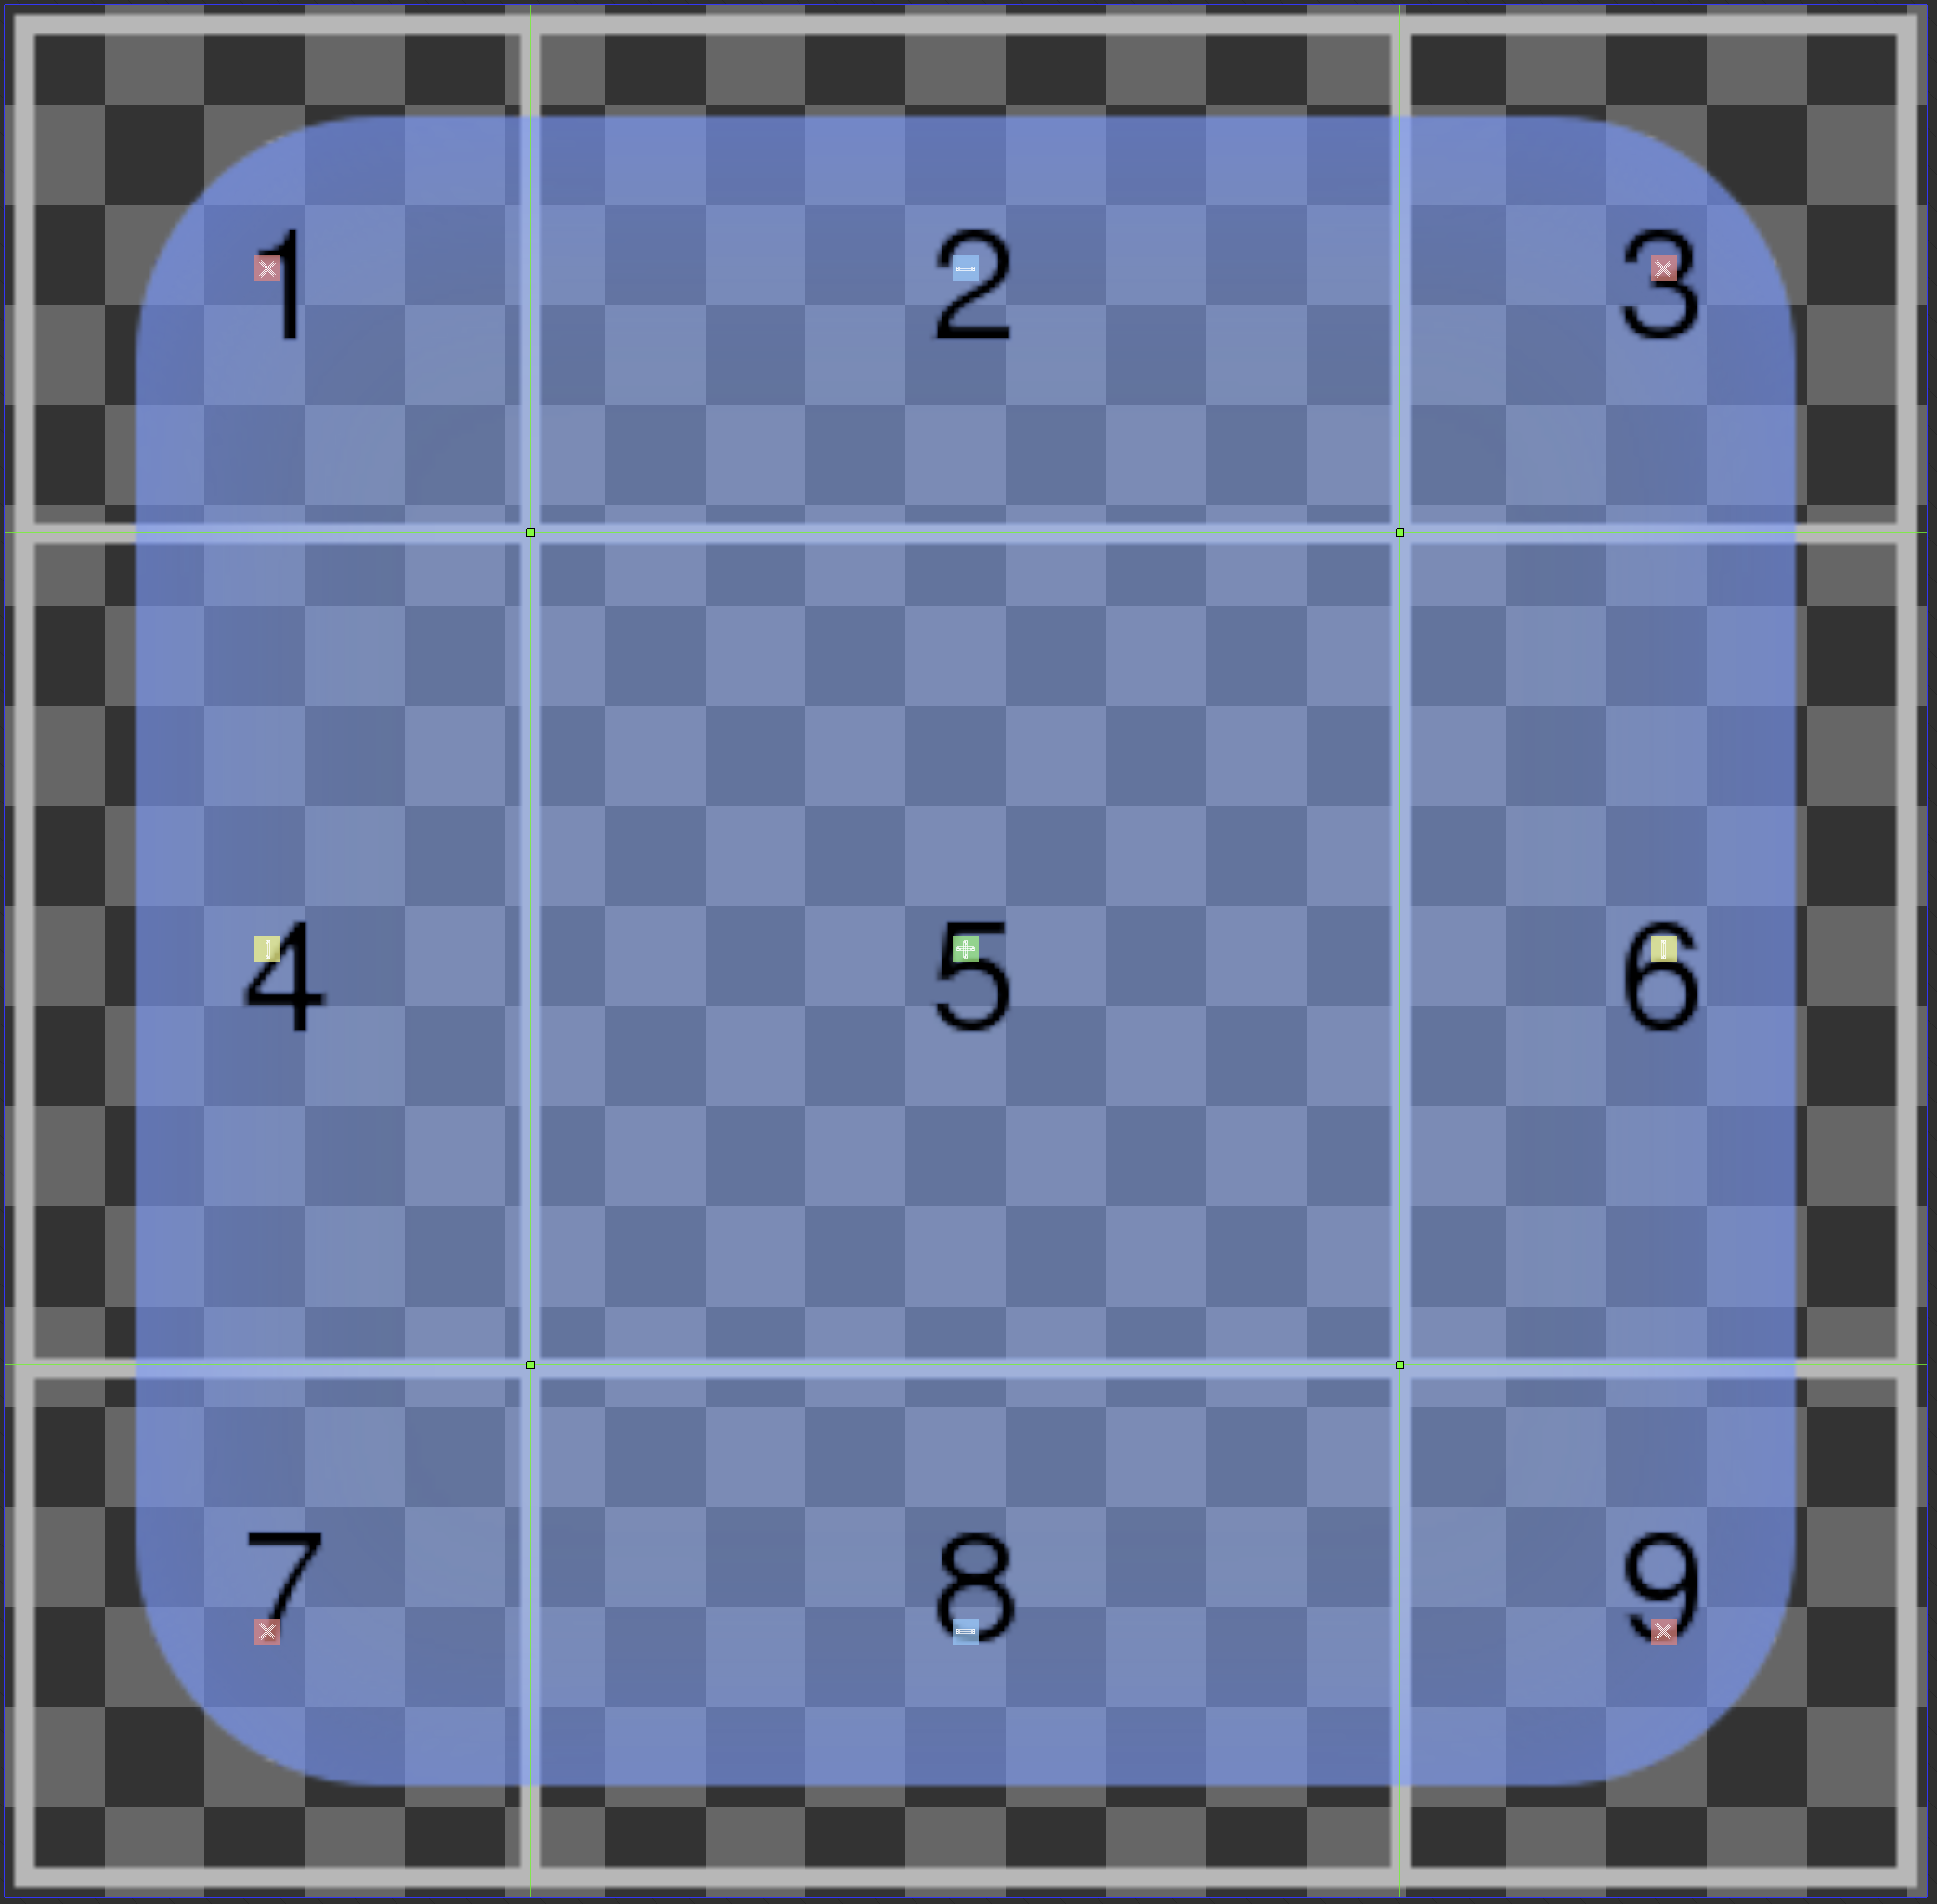
Drag the boundary lines on the screen with the mouse to adjust to the desired position. (Or you can directly manipulate the values in the Axes area on the right.)
-
After that, differentiate and set the parts that should be fixed and the parts that should stretch in each tile.
-
Since we want to achieve the same effect as traditional 9-slicing, let's set each corner to Fixed.

Understanding Tile Settings
Looking closely at the sprite preview screen, each tile's character is indicated by an icon:
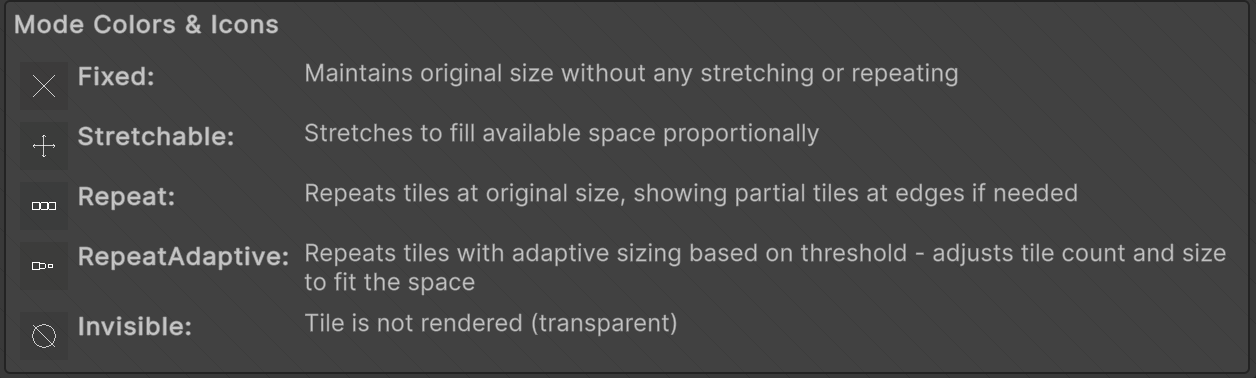
Tiles that are logically impossible according to their settings will be displayed in gray. (For example, when a tile is set to Stretchable while fixed tiles exist in both its row and column.)
Smart Tile Settings
When set to Stretchable, tiles are automatically and intelligently configured to determine whether they can stretch in all directions, horizontally only, or vertically only. Settings that are logically impossible will be displayed in gray and cannot be saved.
Saving Your Changes
Now, click the Save Changes button to save the changes.
Basic Usage of N-Slicer
This guide covers the fundamental concepts and workflow for using N-Slicer in your Unity projects.
Creating an NSliceData Asset
The first step is to create an NSliceData asset:
- Select your sprite in the Project window
- Right-click and select "Create > N-Slicer > NSliceData"
- By double click it, the N-Slice Editor will open automatically
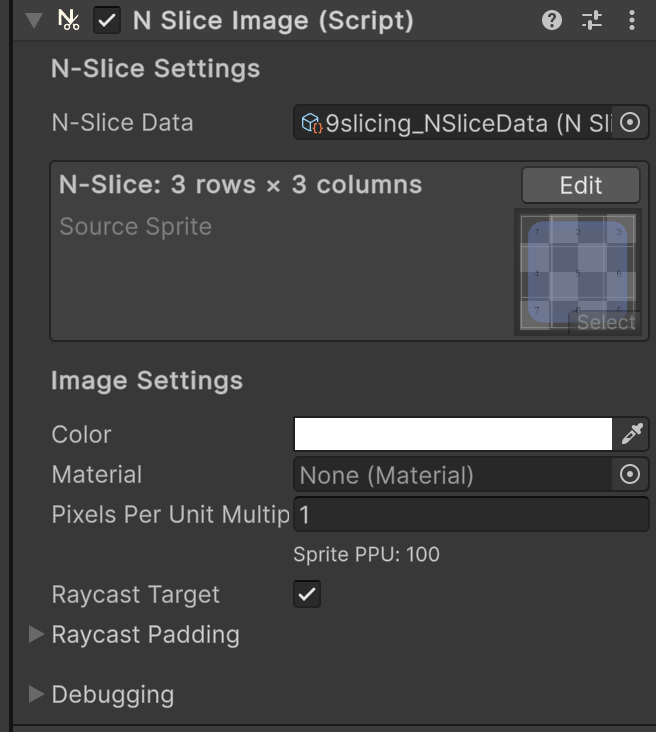
Using with UI Elements
To use N-Slicer with UI elements:
- Add an NSliceImage component to your UI GameObject
- Assign your sprite to the Source Sprite field or assign your NSliceData asset to the Slice Data field
- Adjust the size of your UI element to see the slicing in action
Using with Sprite Renderers
To use N-Slicer with Sprite Renderers:
- Add an NSliceSpriteRenderer component to your GameObject
- Assign your sprite to the Source Sprite field or assign your NSliceData asset to the Slice Data field
- Adjust the size of your GameObject to see the slicing in action